My environment is Windows 7 32-bit.
It is assumed you have already created a working command line firmware build environment as described here.
Set your user PATH variable to contain the ARM tools, make and dfu-util, it should look something like the following:
C:\Apps\spark\GNU Tools ARM Embedded\4.8 2013q4\bin;
C:\Apps\spark\GnuWin32\bin;
C:\Apps\spark\dfu-util-0.7-binaries\win32-mingw32
Make sure the ARM path points to the bin directory under arm-none-eabi and that there are no brackets in the path.
Download and install Eclipse Kepler CPP and start it.
Import each of the three firmware projects in Eclipse using
Import > Existing Code as Makefile Project

Select GNU Autotools as Toolchain:

For the core-firmware project only, from the project contextual menu select:
Make Target > Build…
Add target “all”
Add target “clean”

For the core-firmware project only, from the project contextual menu select
Properties > C/C++ Build
Within the Builder Settings tab set the Build-Directory to
${workspace_loc:/core-firmware}/build

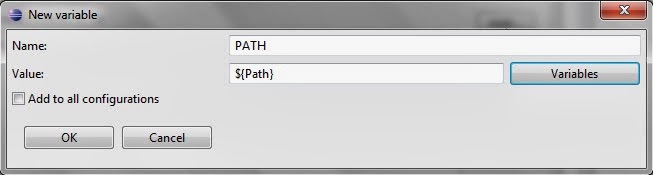
Within the Environment subsection add a PATH variable pointing at your system environment path:

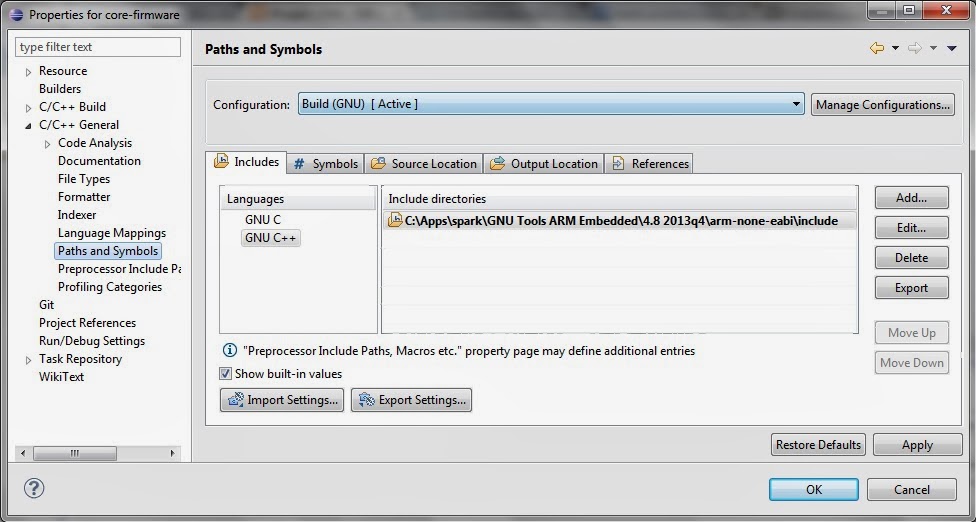
For the core-firmware project only, from the project contextual menu select
Project > Properties > C/C++ General > Paths and Symbols >Includes > GNU C++
And add arm-none-eabi\include subfolder
Add an external run configuration for dfu-util, so that it can be run from within Eclipse:
Run -> External Tools -> External Tools Configurations...

Open application.cpp from core-firmware if you see compile errors, from the project contextual menu try: Index -> Rebuild